More Weaving!

Yes, there has been more weaving.

First things first, I fixed the floats in my Looking Glass Scarf. The repairs are virtually invisible, so it’s like it never happened. 😁 I still haven’t received the fringe twister I ordered, so the scarf isn’t technically finished, but I still marked it as a FO on the Ravelry project page.

After the Looking Glass Scarf debacle, I knew I needed to get right back up on the horse, so I warped my Cricket loom with some left-over vintage (1990s) sock yarn. (Click here if you want to look at my Ravelry project page.) Ninety ends on a 10-dent heddle:

As usual, I forgot to take pictures during the winding of the warp and dressing of the loom. Heck, this picture was take when I had only a tiny bit of weft yarn left to weave. I messed up when warping the yarn and ended up with the scarf being a bit off center on the loom, but at least I didn’t have any major tensioning issues. Please don’t look closely at the fell line. It’s a little wonky. ::sigh::

Unfortunately, I seriously overestimated the amount of sock yarn I had, and I made the warp too long. I was able to get a wearable scarf, so it wasn’t a fatal problem, but there was unnecessary waste, and I hate wasting yarn, even if it’s really old leftover sock yarn.

My selvedges leave a bit to be desired, but they aren’t horrible. I might attempt to fix some of the looser ones before I wet-finish the scarf.

I wasn’t kidding when I said I had a lot of wasted yarn.

The scarf still needs to have some ends woven in and the header removed. And I haven’t decided yet what I am going to do with the fringe. I’m leaning toward either twisted or braided, but i might just end up knotting it.

In this close-up shot, you can see all the variation in the blue-green sock yarn. I think it paired up really well with the solid color.

It took me several days to finish this scarf because life happened. But it was a quick and easy project. I’m hoping that wet-finishing will improve the look of the fabric. As you can see in the picture, my beating is still pretty uneven.

Here’s a teaser––I have yet another project off the loom, one that took just one evening start to finish (except for washing it). So keep your eyes peeled.

Weaving Fail Part 2

So, in my last post, I said that I would talk a little more about this picture:

Being a total newbie to rigid heddle weaving, I didn’t notice anything unusual when I took this picture, but to an experienced weaver’s eye, there is a giant red flag waving vigorously. If you look closely at the warp where it winds onto the warp beam, you can see that it is slightly fatter in the center and thinner at the edges. This is because the warp tension is uneven. The tension is tighter on the edges than in the middle. Tension problems are a beginning spinner’s nightmare.

I think there are two reasons why my warp had uneven tension. One is because the yarn I used is pretty stretchy. Stretchy yarn requires extra care when used for a warp and weaving skills that I as a total novice simply lack. But I think the stretchiness of the yarn is just a minor issue here. I think the main reason for the uneven warp is the fact that the warp spread out a bit when I was winding it onto the warp beam. If you look on the left side of the warp, you can see that the part of the warp that goes over the wooden rod (the back beam) is wider than where the yarn comes out of the heddle (the white plastic thing). When this happens, and it happened on both sides of the warp, the threads on the area that spreads are going to be shorter than the threads on the area that doesn’t spread, and that will eventually cause problems with tension in the weaving because the edges will be tighter and the middle will be looser.

Had I noticed this when I was taking the picture, I could have unwound the warp and fixed it. But I didn’t notice it until it was too late to do anything about it. So my weft curved and developed the dreaded smile, which resulted in this:

The scarf before wet finishing (washing). It’s fine at the very beginning of the weaving, but as the weaving progresses, it develops pretty severe rippling in the center. At this point I was hoping that wet finishing would lessen the rippling at least a little bit.

After washing the scarf, I was happy to see that the rippling effect had lessened a little bit. It’s definitely still there, as I knew it would be, but it’s not as bad as it was when the scarf came off the loom.

And then there are the 5 or 6 places where I missed a warp thread. This is called a float, and it can be fixed, but it’s best to fix floats before wet finishing. I might try anyway, although I don’t have a lot of leftover yarn. Maybe I’ll fix the ones that stand out most first and if I still have enough yarn, I’ll fix the ones that are less noticeable.

After washing and pressing, the scarf is definitely less ripply. However, my photography is still rubbish.

The bottom quarter has no ripples at all.

The ripples don’t show when the scarf is being worn.

This picture really captures the range and beauty of the colors in this yarn, Knit Picks Imagination (discontinued) in the color way Looking Glass. Yes, the fringes are two different lengths. I haven’t cut the fringe on one of the ends yet. I plan to do a twisted fringe, so I ordered a fringe twister, which should come later this week. I think a twisted fringe finish will look great on this scarf.

I’ll be honest, although I am disappointed that this scarf didn’t come out perfect, I am still very happy with it. I think it is beautiful, even with its imperfections, and I look forward to wearing it this winter.

Project #3, a scarf made with some pretty vintage leftover sock yarn, is on the Cricket and nearly finished. It’s another fail, but for completely different reasons. Stay tuned for more details.

Weaving Fails Part 1

As a novice weaver, I expect to make mistakes. Lots of mistakes. One learns by making mistakes, and judging from the number and magnitude of the mistakes I made on weaving project #2, I learned a lot. How much I learned remains to be seen, but how much I screwed up is documented in pictures, so I will tell the tale with pictures and captions.

This yarn had been in my stash for at least 6 years. It’s Knit Picks Imagination, a wool/alpaca/Nylon blend fingering weight sock yarn in the color way “Looking Glass.” It’s a tonal yarn with beautiful shades of blue ranging from almost green to almost purple. I thought it would make a gorgeous scarf.

I dug out my old Knit Picks yarn swift…

and wound the three skeins of yarn using my ball winder and my indispensable mashed potato stool, which I also use to hold my warping peg.

I set the mashed potato stool in position to wind a 3-yard warp.

Unfortunately, I forgot to take pictures while I was direct-warping the loom, but here is a shot from the back of the loom after I was all done warping and threading the heddle. There is a big red flag here that I, as a total newbie, didn’t notice, but it is definitely visible in the picture. More on that later.

I tied the warp onto the front apron. Everything looked good to me. Time to get started with the weaving.

With the header done–that’s the thicker white yarn that I wove in to spread out the warp, I wove a few inches, then hemstitched the bottom of the scarf. This was my first time hemstitching. It’s easy to do and although it is a bit tedious, it’s a nice looking way to secure the end of the scarf.

So far, so good. You can see all the difference shades of blue in the yarn. They look lovely together. And my selvedges (the far edges) are quite spectacular, if I do say so myself.

So far, everything look great, but soon disaster will strike. Stay tune for the second part of the saga.

The Latest Toy

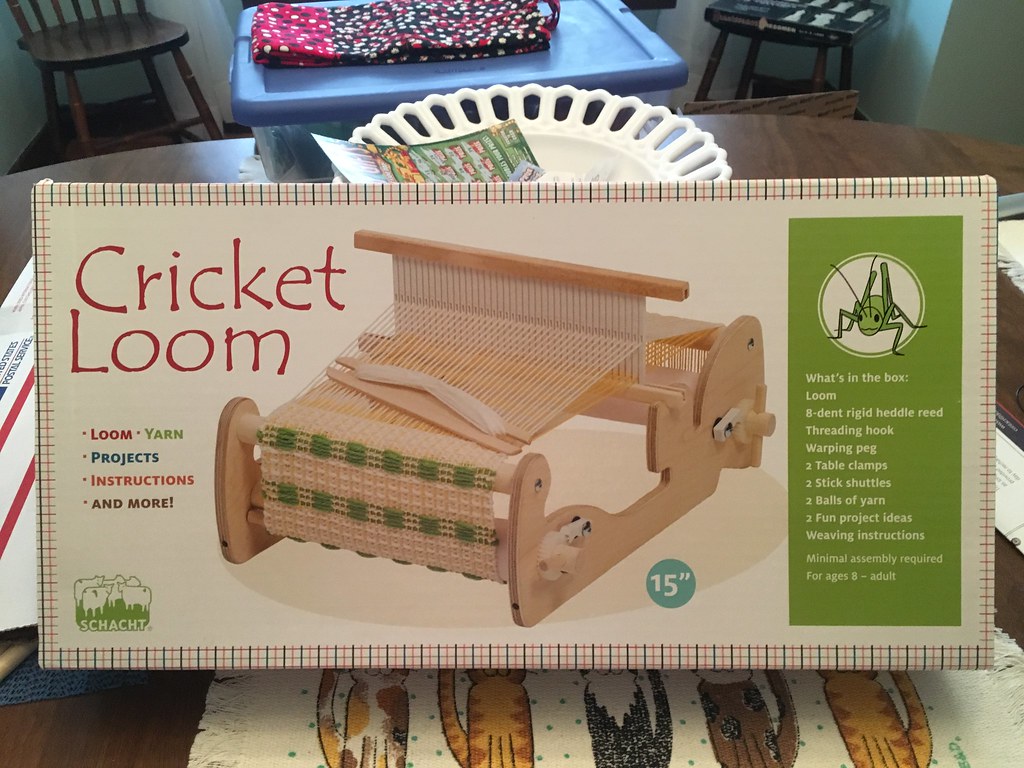
A lot has been happening in Pinkoknitter’s fiber world, and I really must spend some time over the next few days updating my blog. As you already know, I recently bought a Schacht 15-inch Cricket Loom, which is a rigid heddle loom.

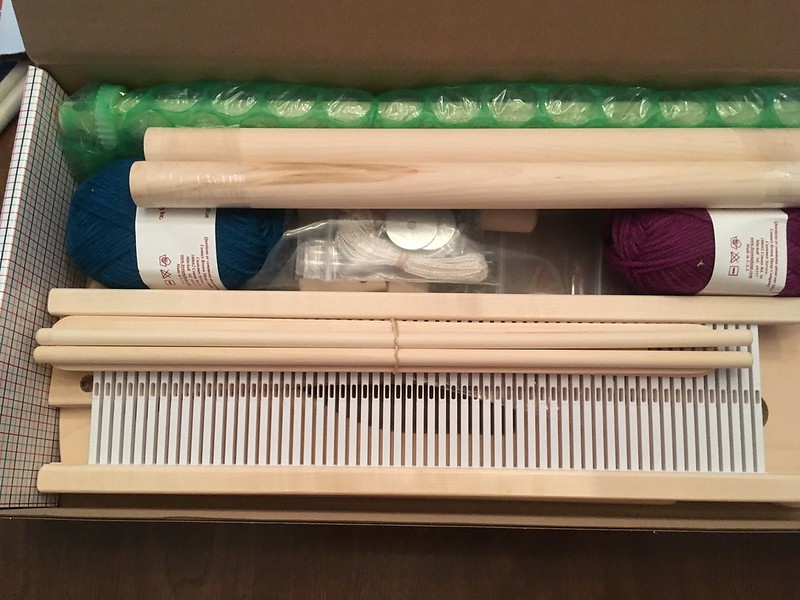
The Cricket loom come unfinished and unassembled. I purchased mine from The Spinnery on Etsy. Great prices and great service.

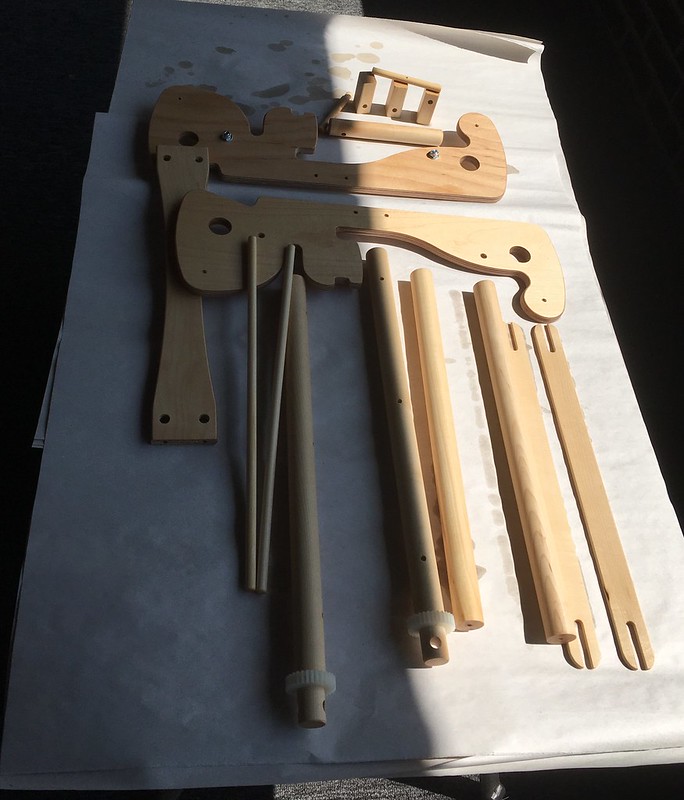
Many Cricket owners leave their looms unfinished, but I decided to finish mine with clear Danish oil. I was too lazy to move the table to a part of the porch where the lighting was consistent. So sue me for photography malpractice.

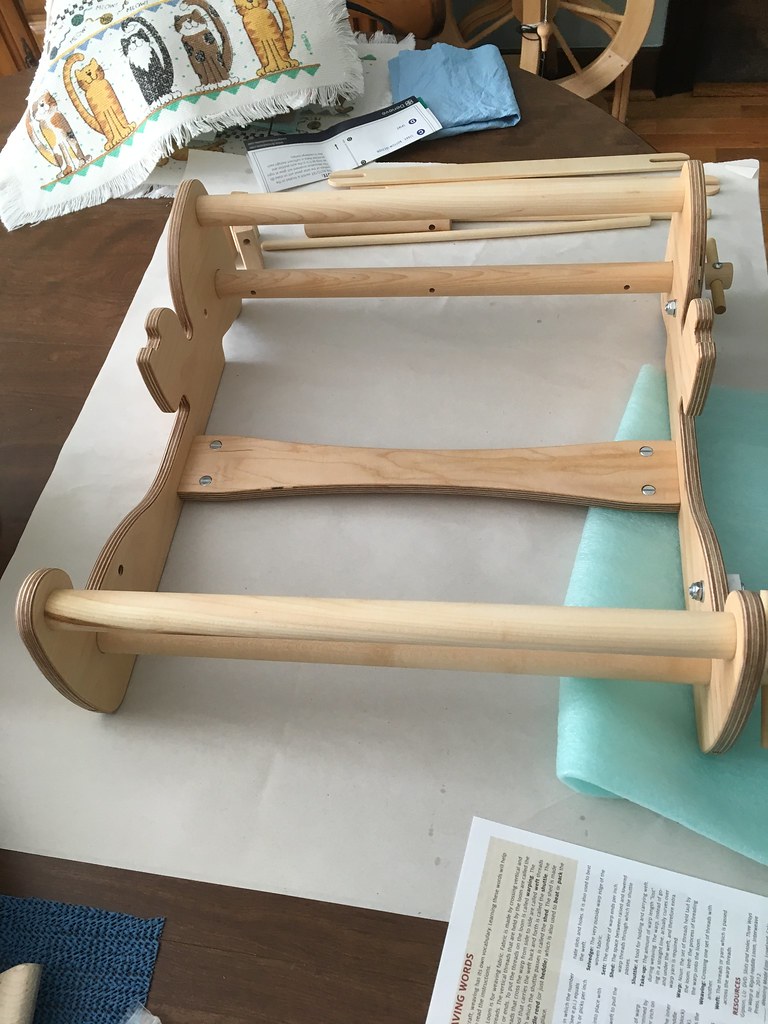
The loom is really simple to assemble. I didn’t drop a single F-bomb when I put it together. Not a single one, it was that simple.

I have mulled over learning to weave for quite a few years, but always decided against it because warping/dressing a loom, that is, measuring out all the warp threads and putting them on the loom through the correct slots and holes in the correct order without ending up with a massive amount of yarn vomit, seemed to me to be a daunting task.

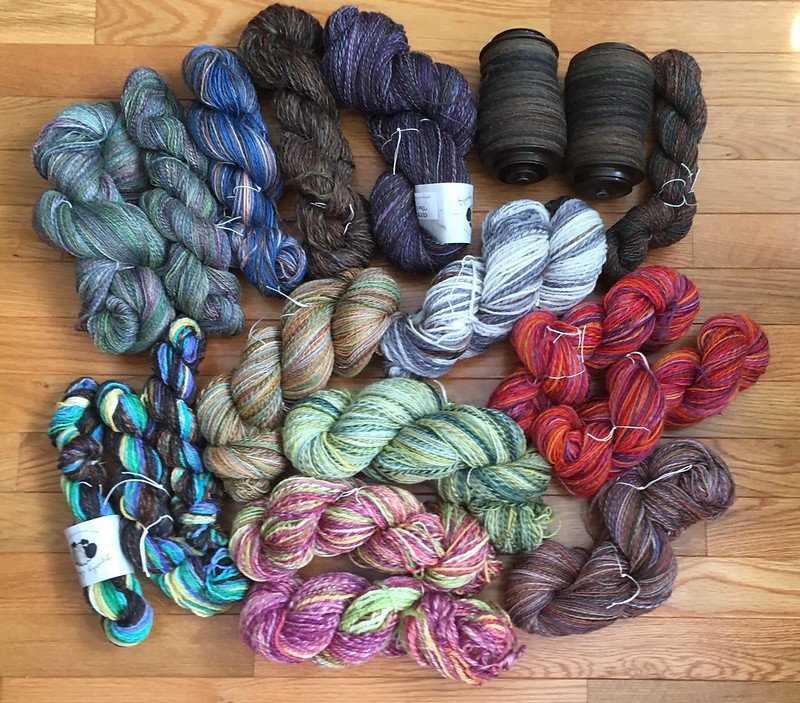
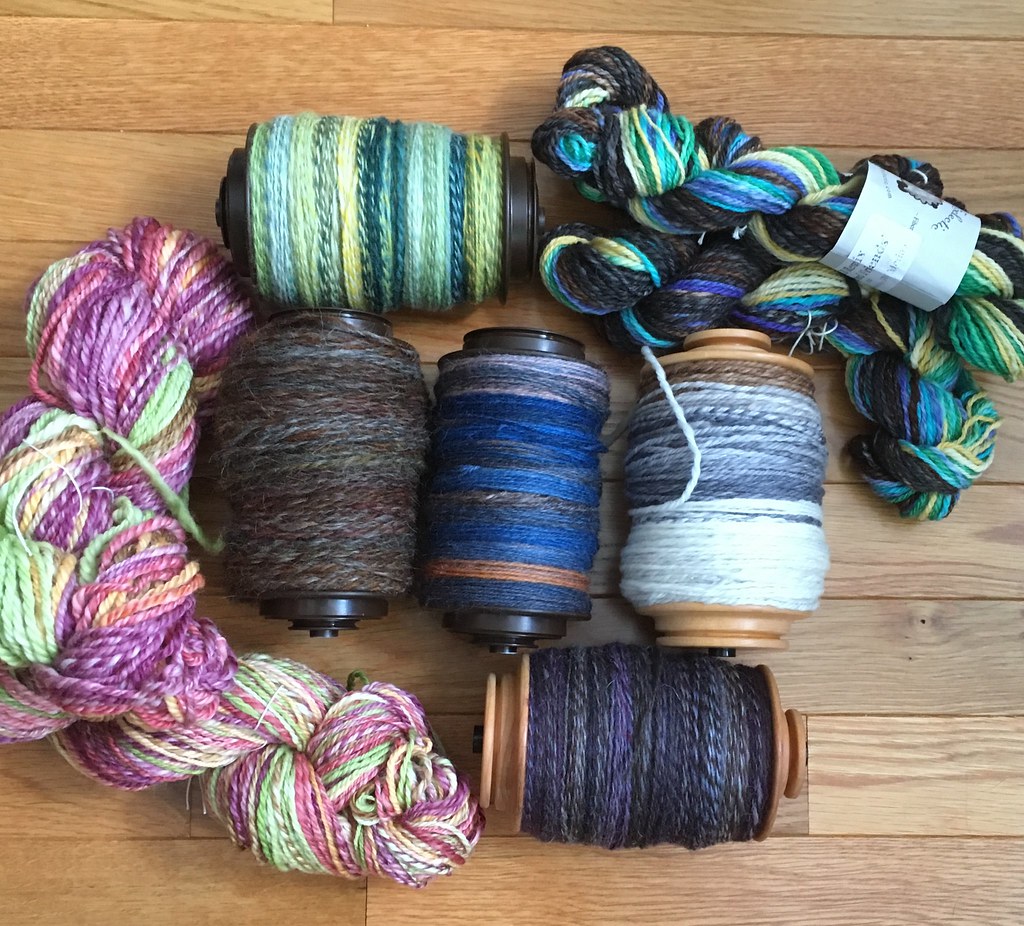
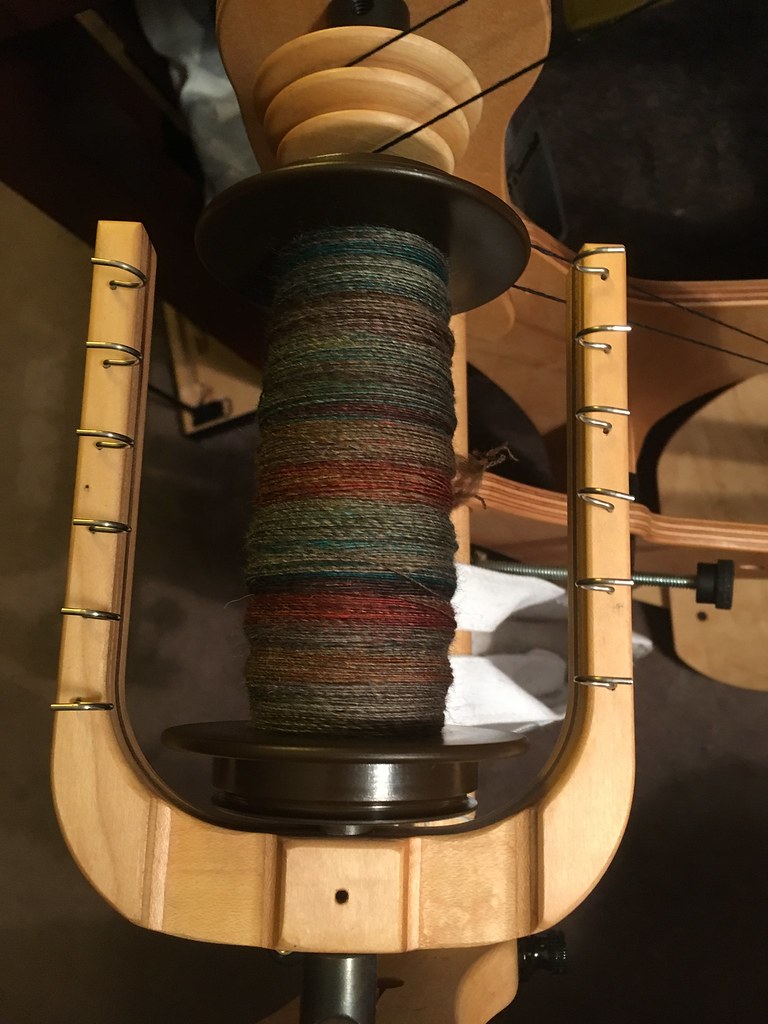
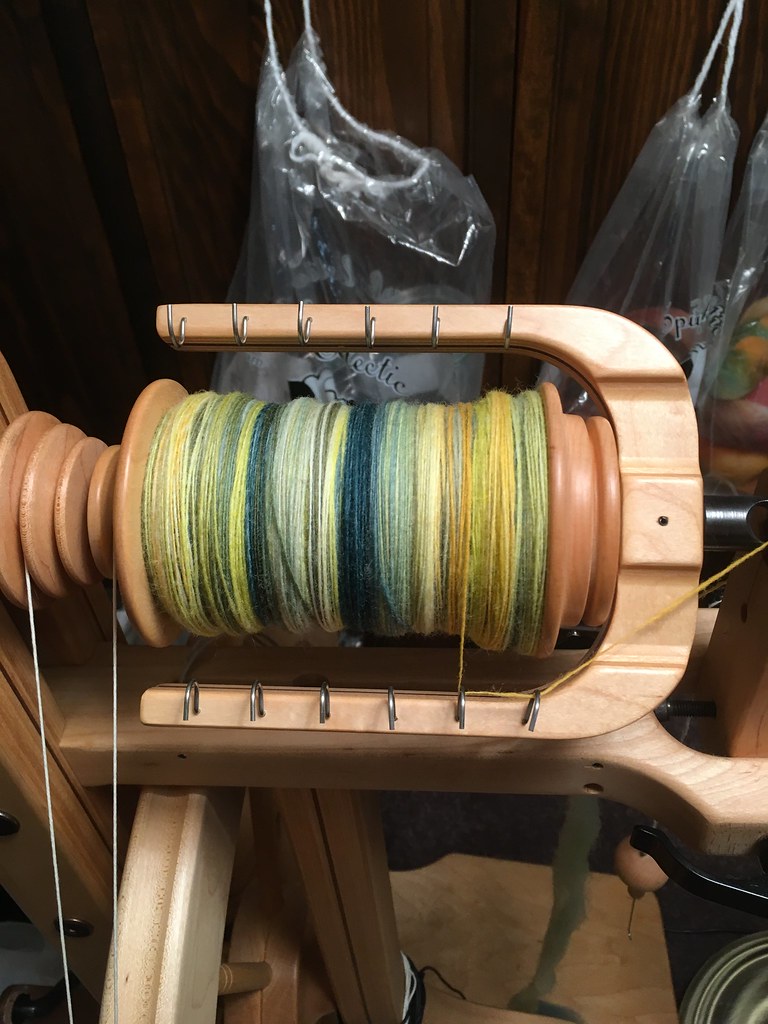
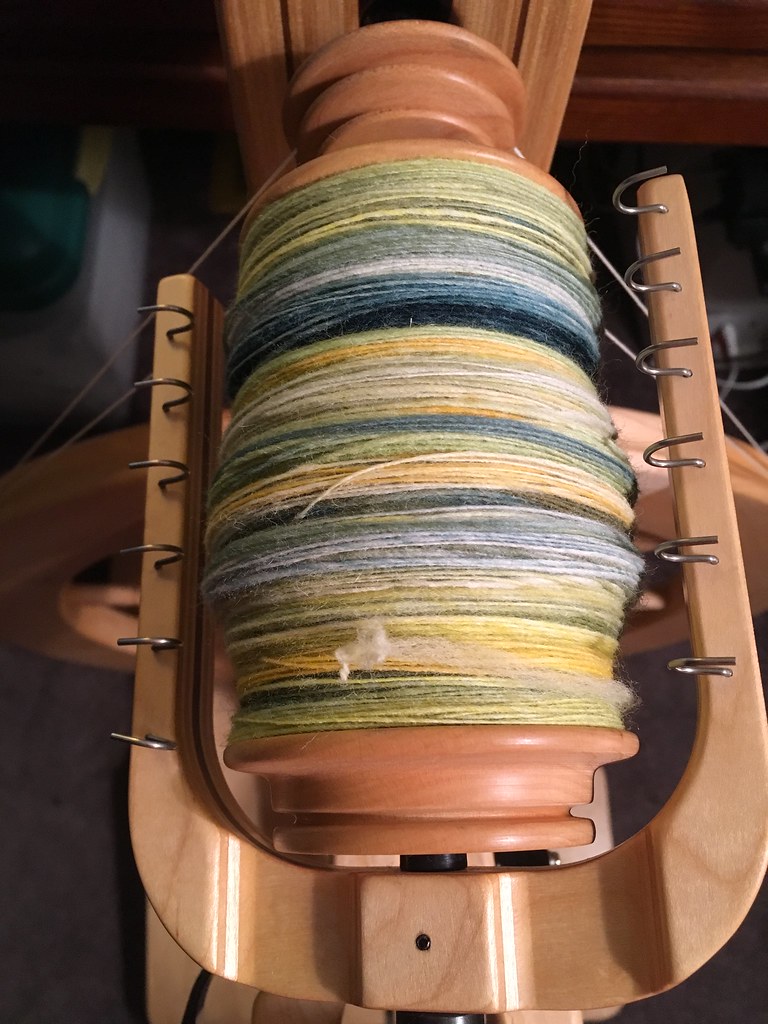
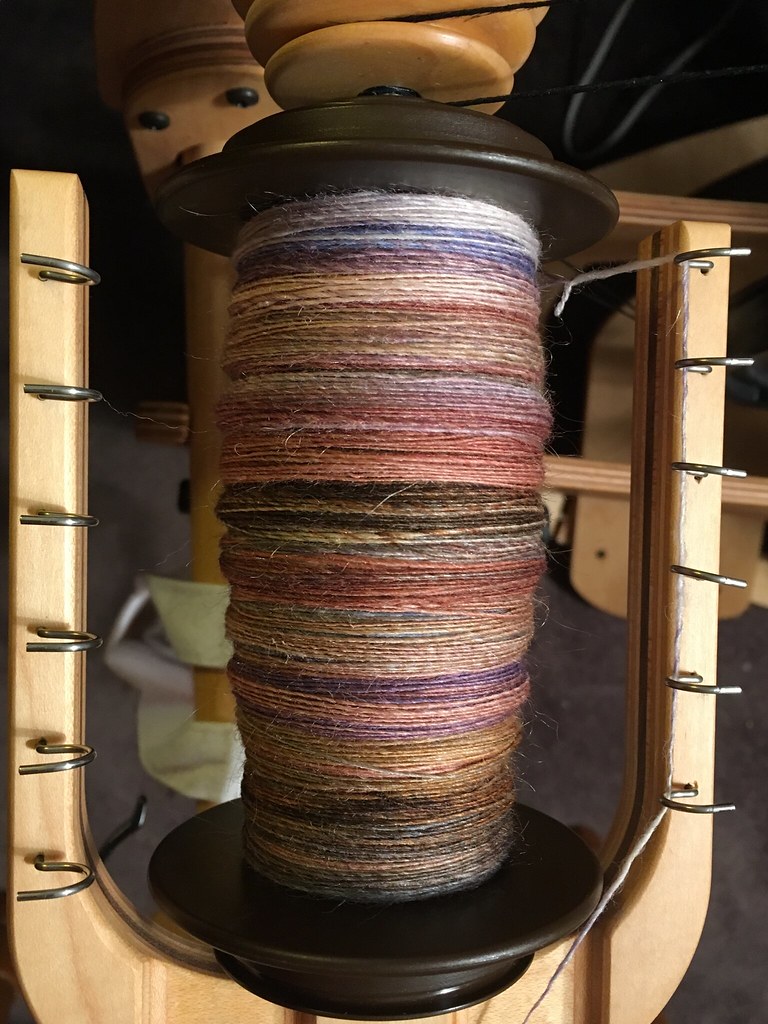
But as my stash of handspun yarn has continued to grow, and my stash of sock yarn has not diminished, I became desperate to find a way to do some stash-busting. And weaving is a great way to bust a stash. Although weaving uses less yarn than knitting, it is much faster. In the time would take me to knit a single 5- or 6-feet-long scarf, I could weave a whole wardrobe of scarves. And it turns out that warping a rigid heddle loom isn’t all that daunting a task. In fact, it is pretty easy.

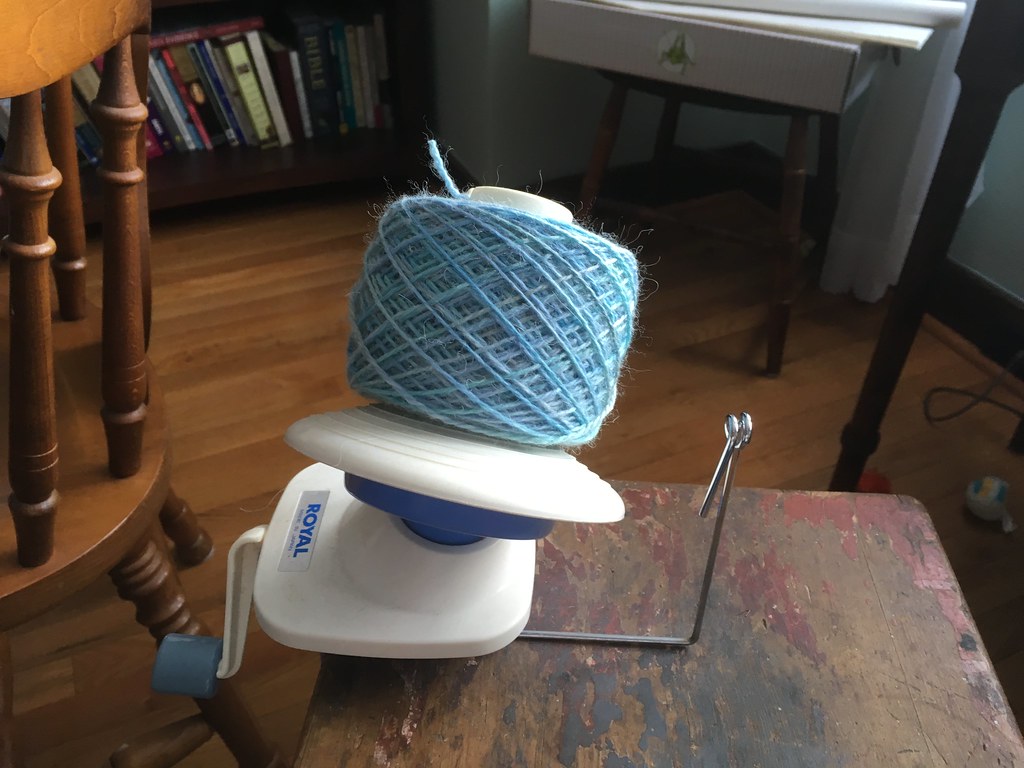
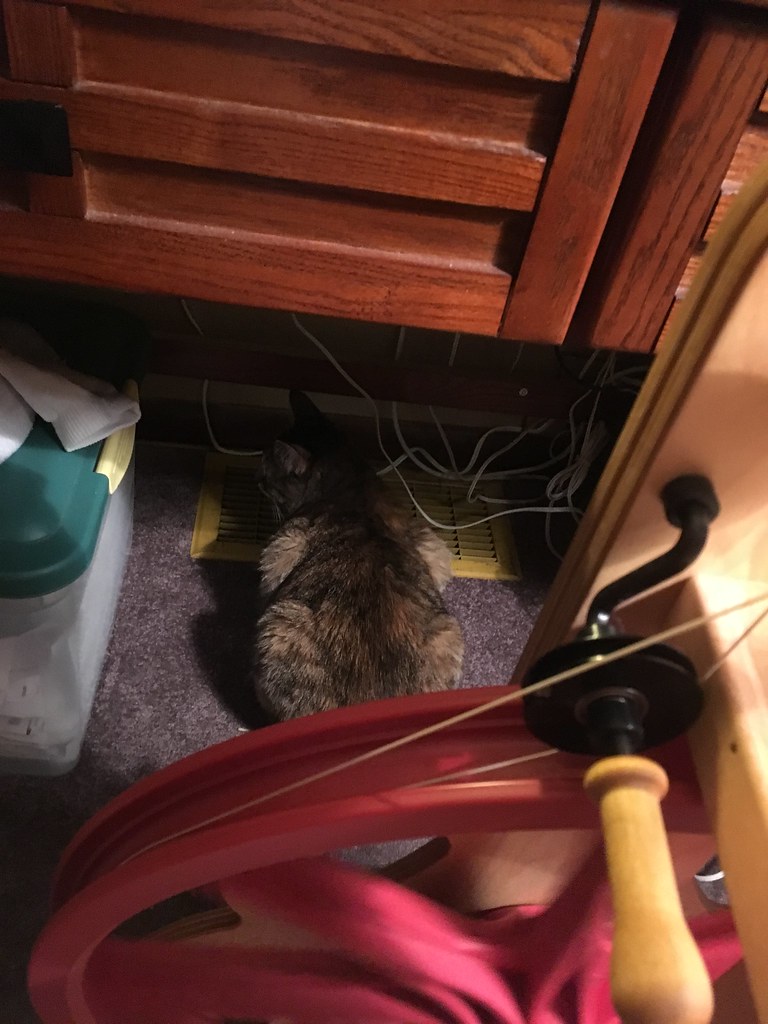
I clamped the warping peg to my multi-purpose “mashed potato” stool which is also the permanent home of my ball winder.

It took me two false starts before I got it right, but once I figured out what I was doing wrong, I zipped through the process.

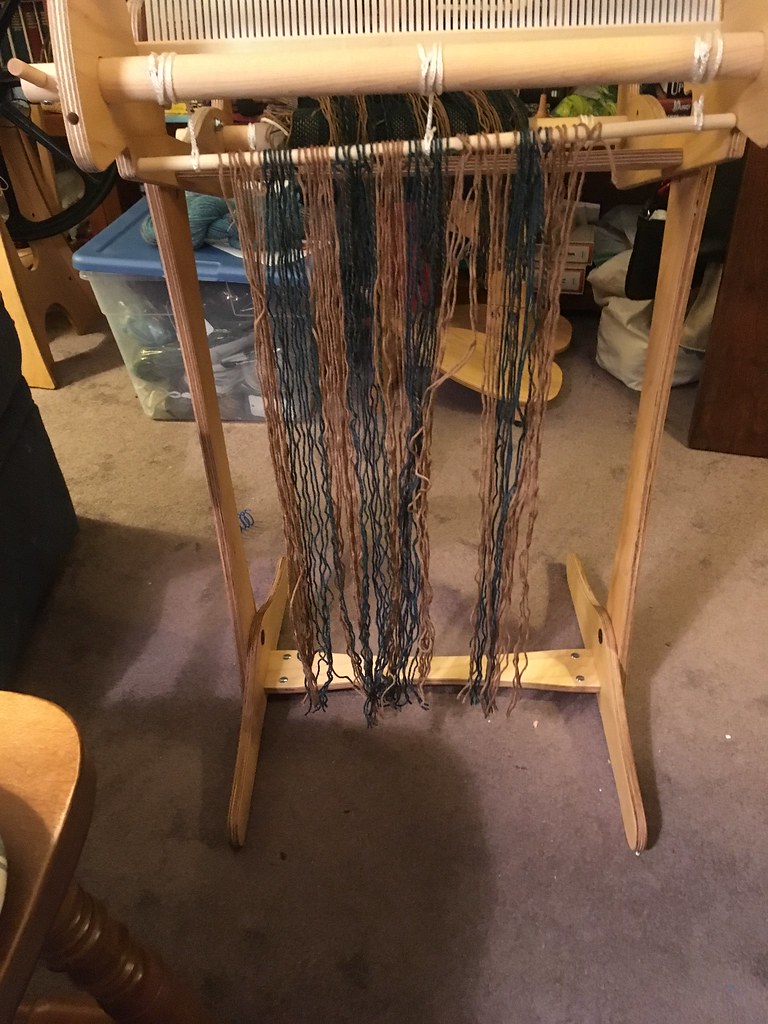
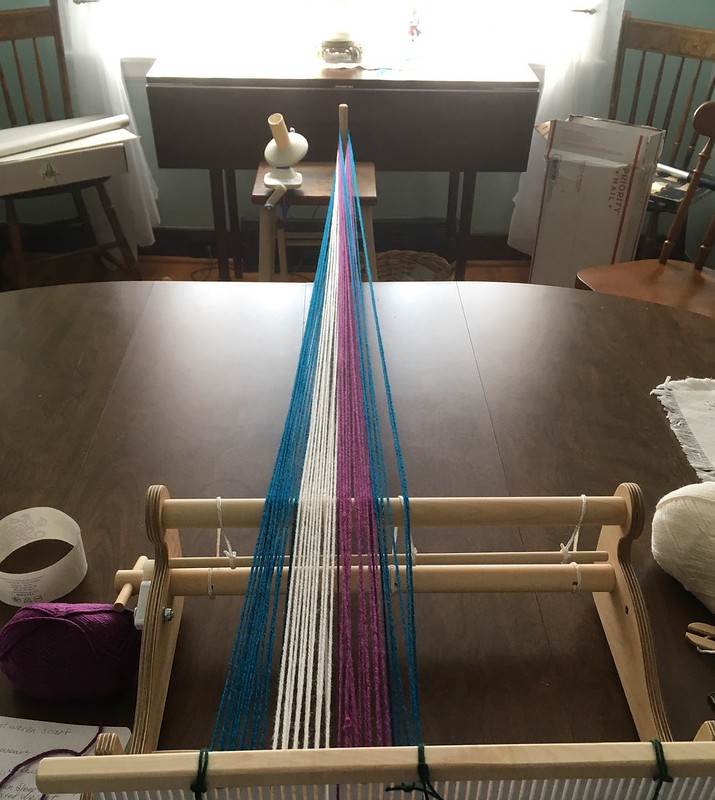
This picture shows the front of the loom with the warp wound onto the warp beam in the back, which you can see in the next picture. In this picture you are looking at the part of the warp that was wound around the warping peg. I cut the loops and tied a loose overhand knot in the end of it and then wound the yarn on the warp beam. I couldn’t have done it without the help of my DH who held the warp taut while I turned the knob that moves the warp beam. 

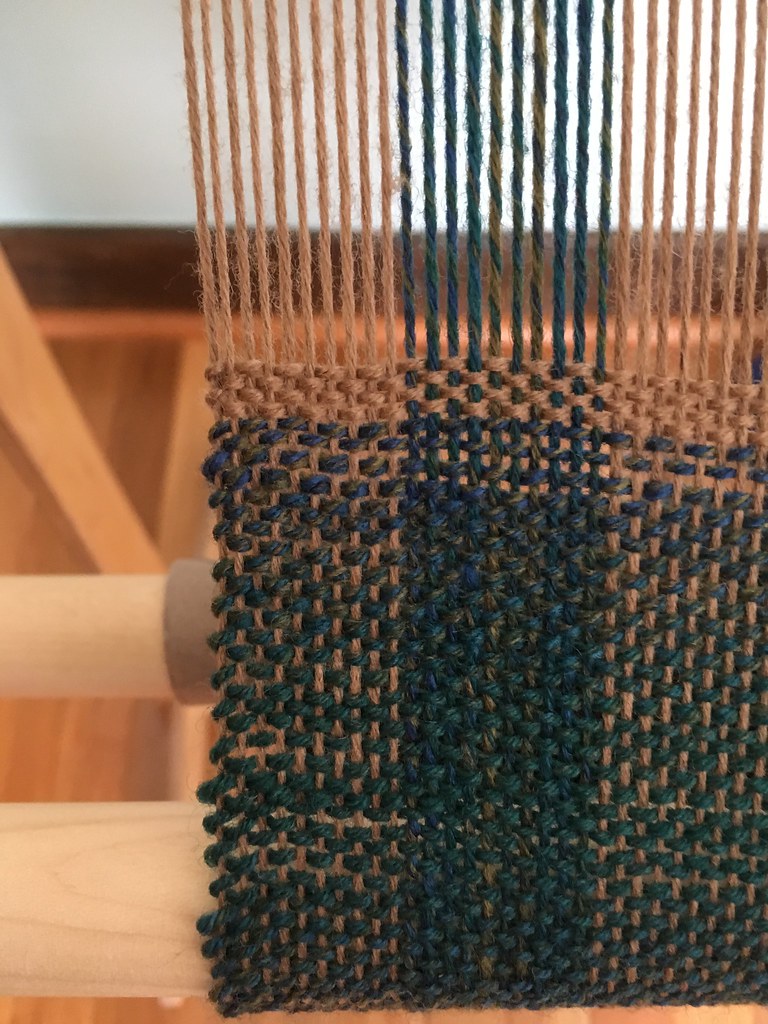
With each turn, I needed to insert a warp separator to keep the yarn from sticking to itself as it wound round the beam. Many weavers use kraft paper, but I bought some cardboard warp separators because I thought they would be easier to use than paper. You can see the warp separators in this picture, and you can also see that my warp is in need of a good tug from the front side to even up the tension on the warp threads.

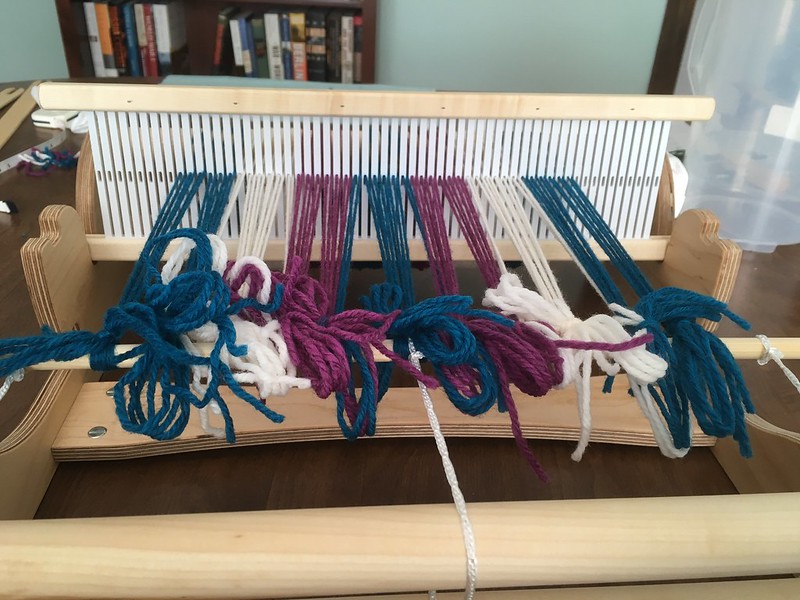
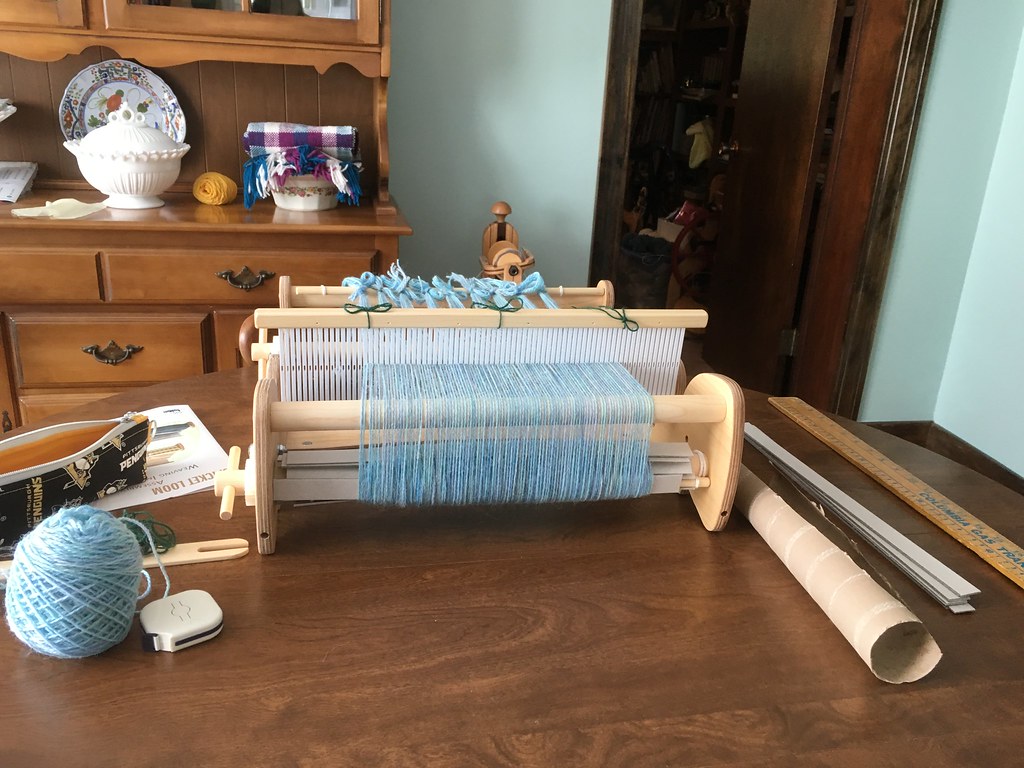
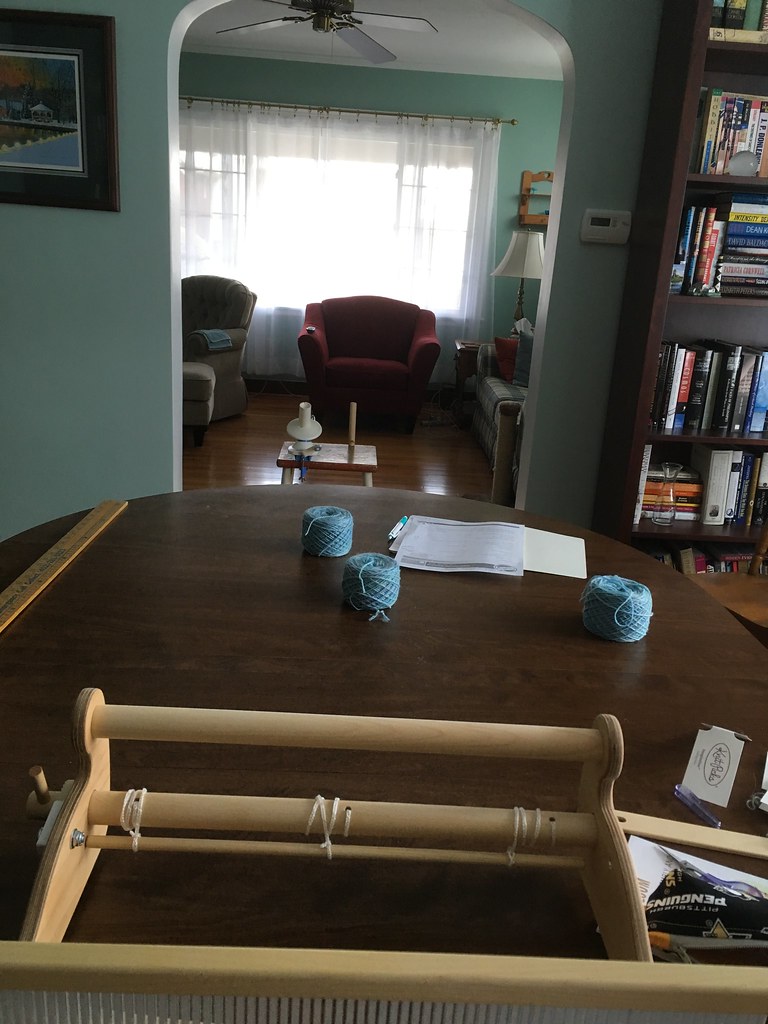
This is the front of the loom again. I got all the warp threads into their proper hole or slot and I tied them to the front apron and made sure they were very taut. I just need to roll them onto the cloth beam, place a separator when the bows are, weave a header to spread the warp evenly, and I’ll be ready to start weaving.

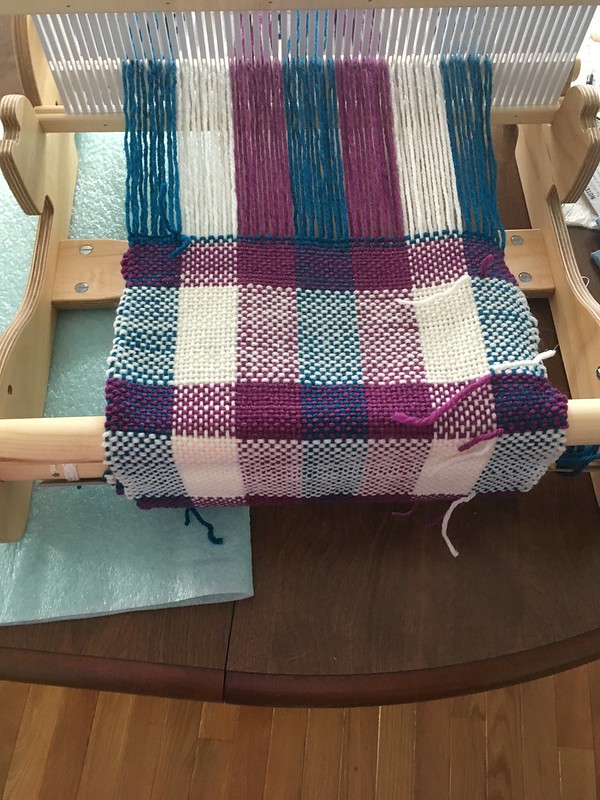
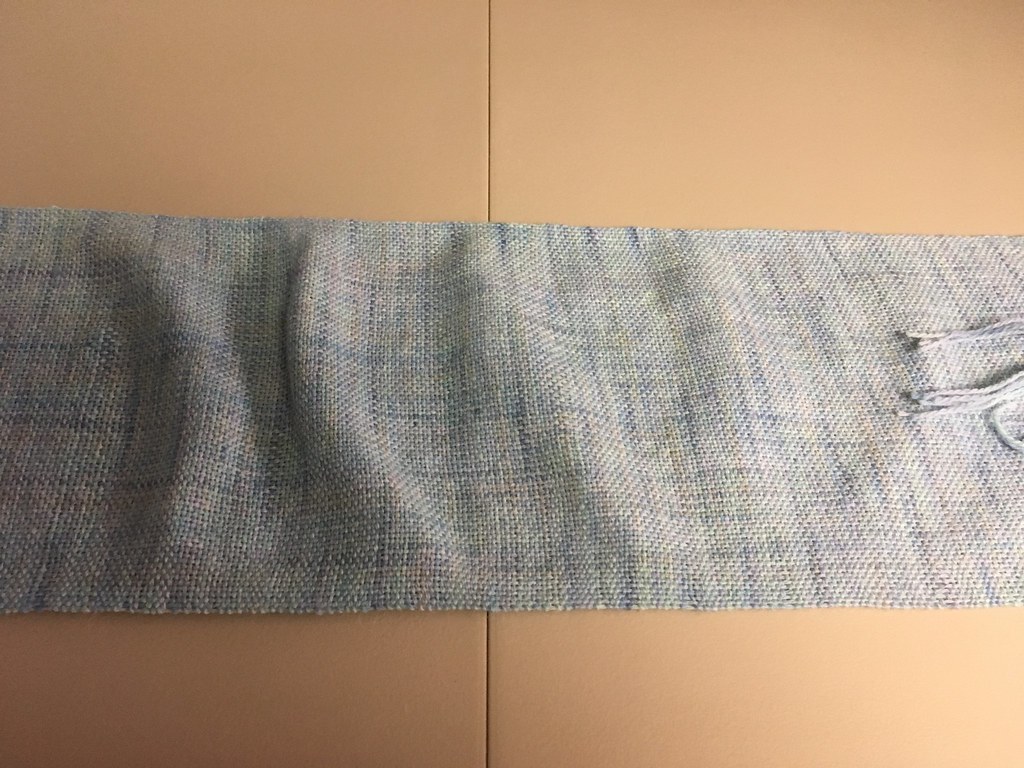
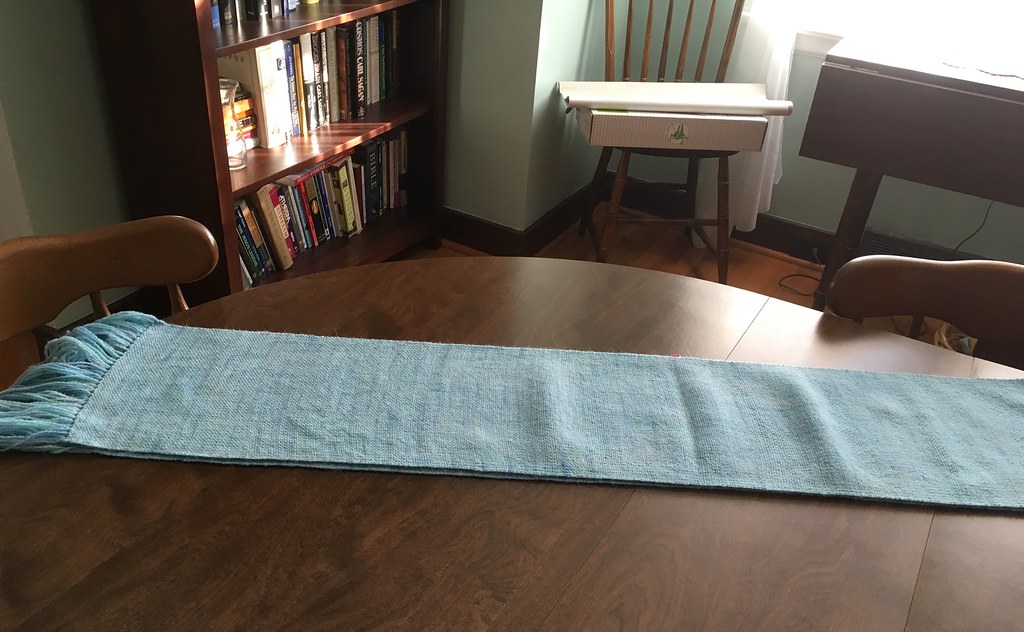
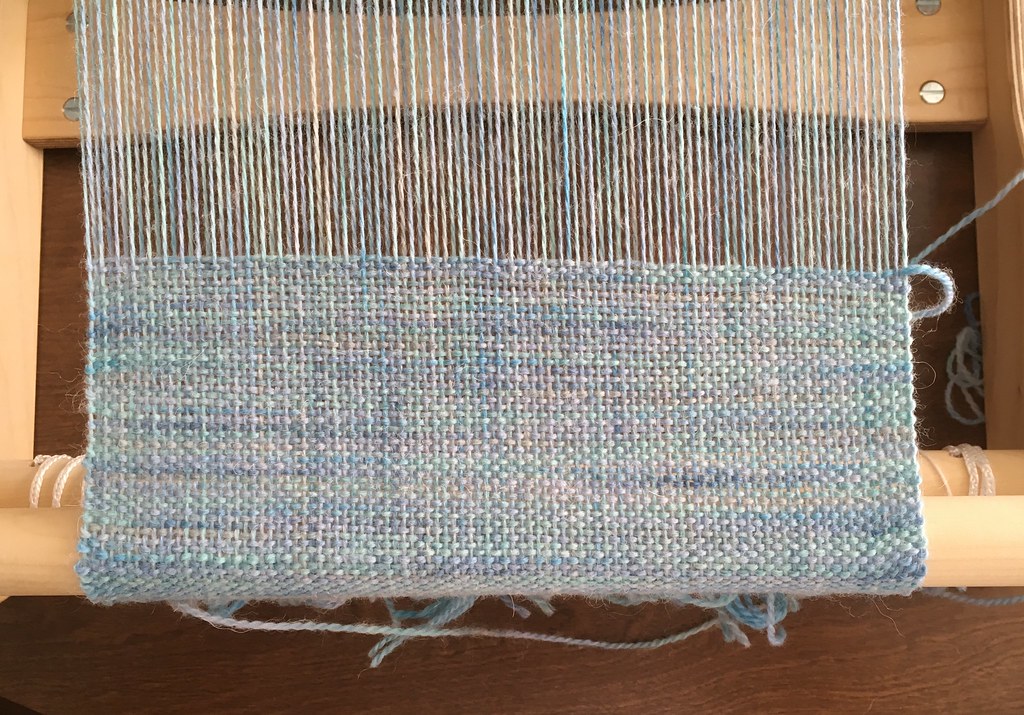
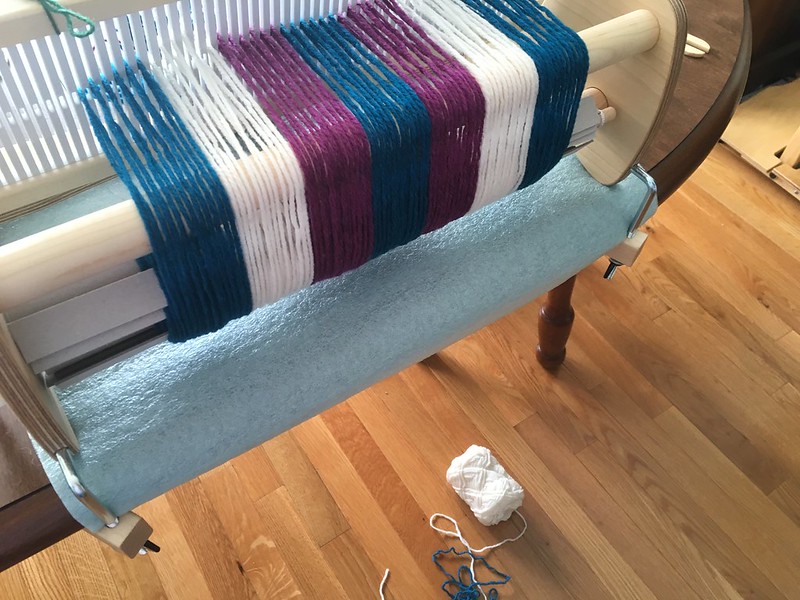
So, I forgot to take pictures while the weaving was in progress, but here is a picture of the scarf once the weaving was finished. The extra length of warp became fringe. I completed the weaving in a single evening. The ends sticking out are where I changed colors. Just like knitting, weaving requires weaving in ends. Once the scarf is washed, I will snip the ends off.

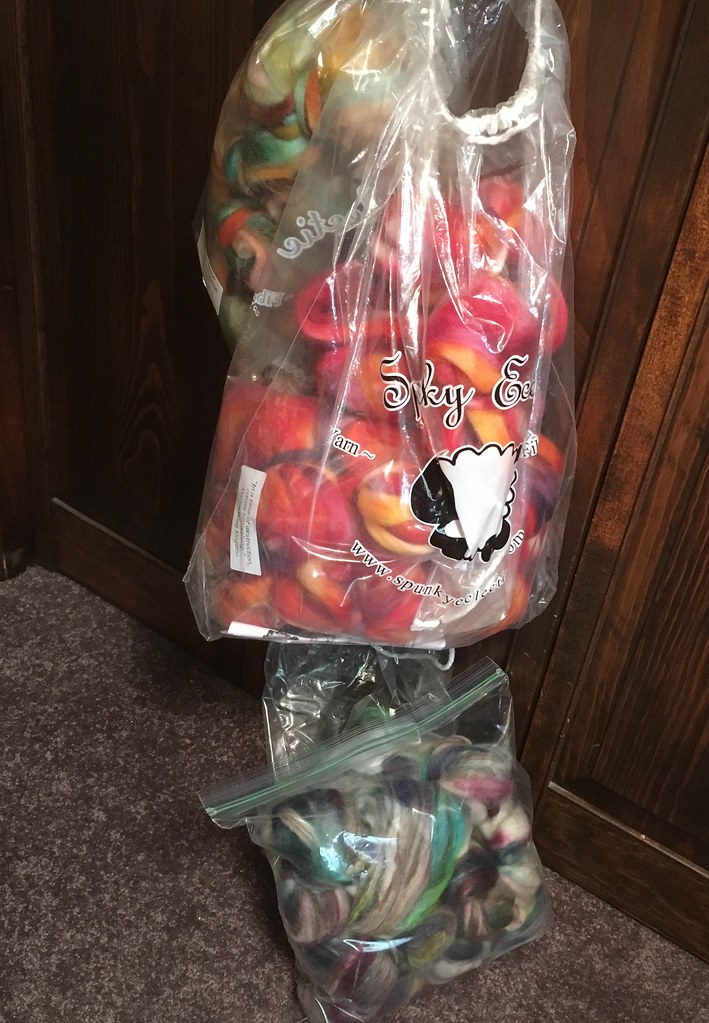
I have enough sock yarn in my stash to knit at least 100 pairs of socks. A pair of socks takes me at least 2 weeks to complete; a woven scarf takes only a few hours. I know this for a fact because––

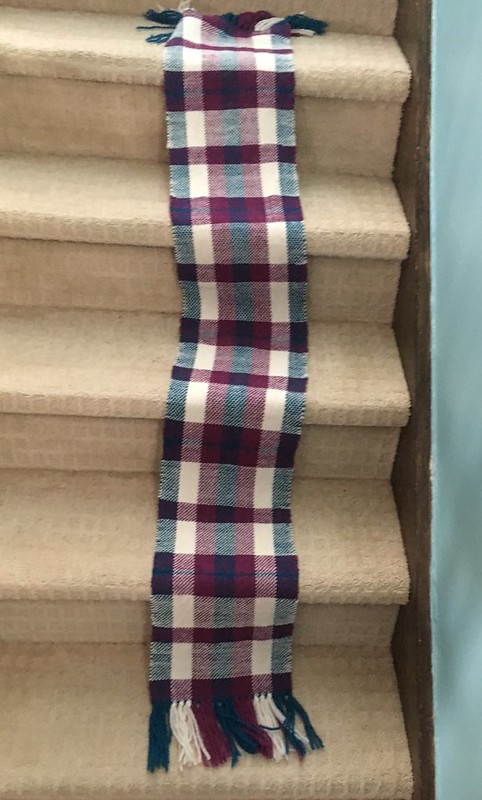
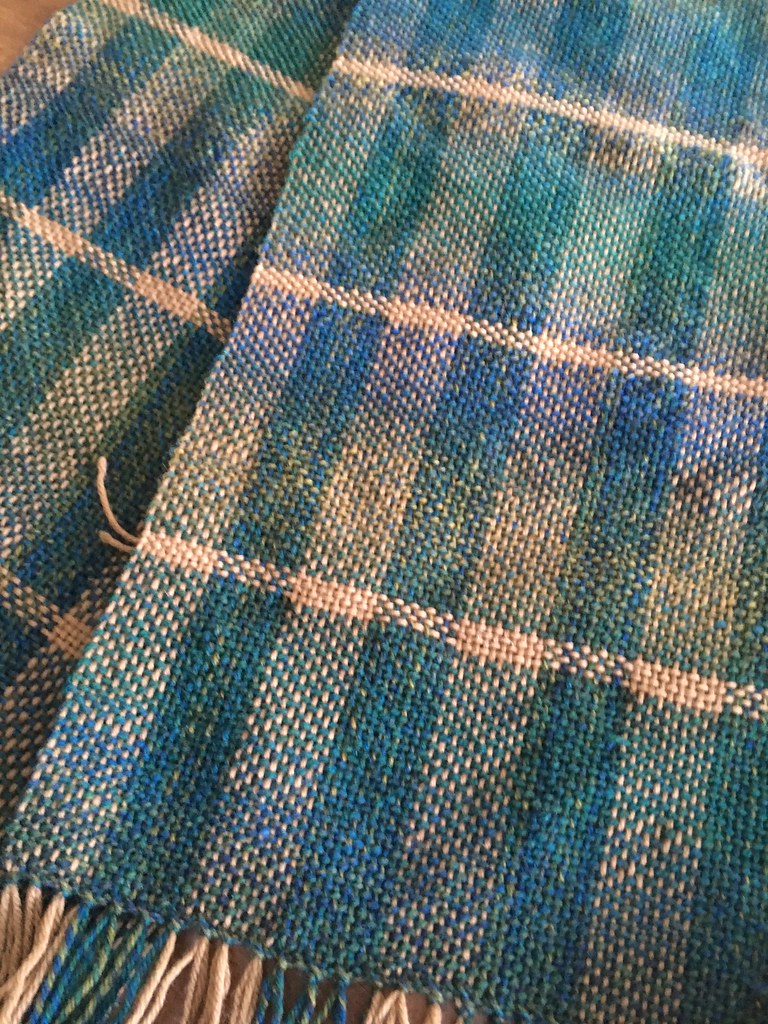
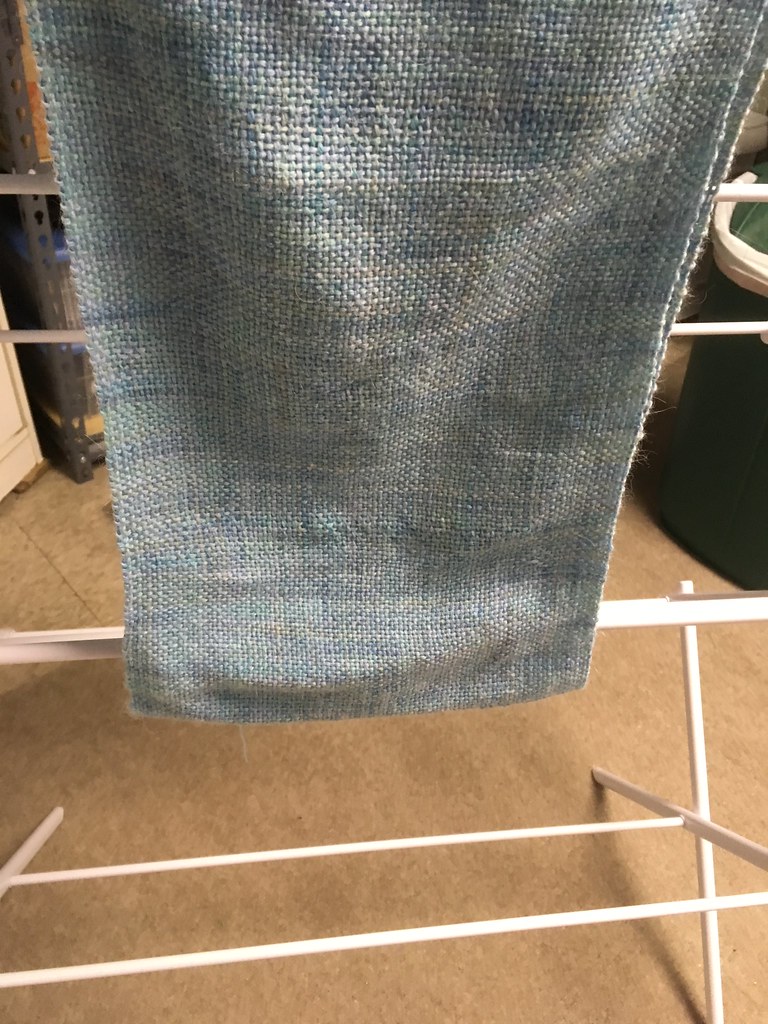
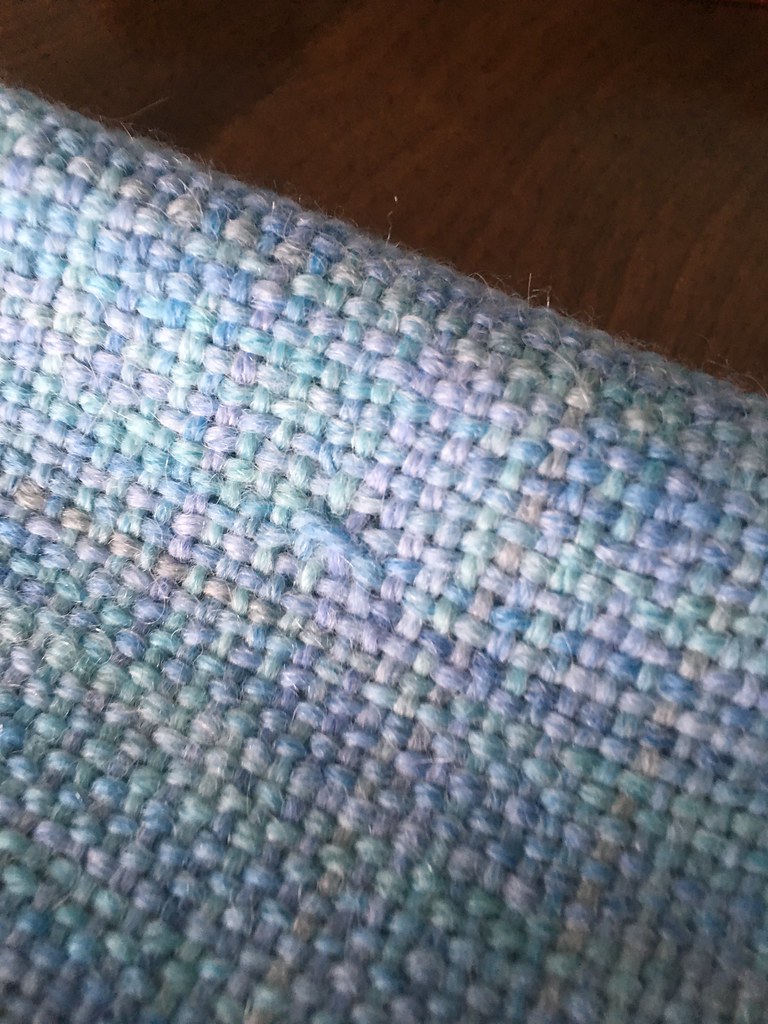
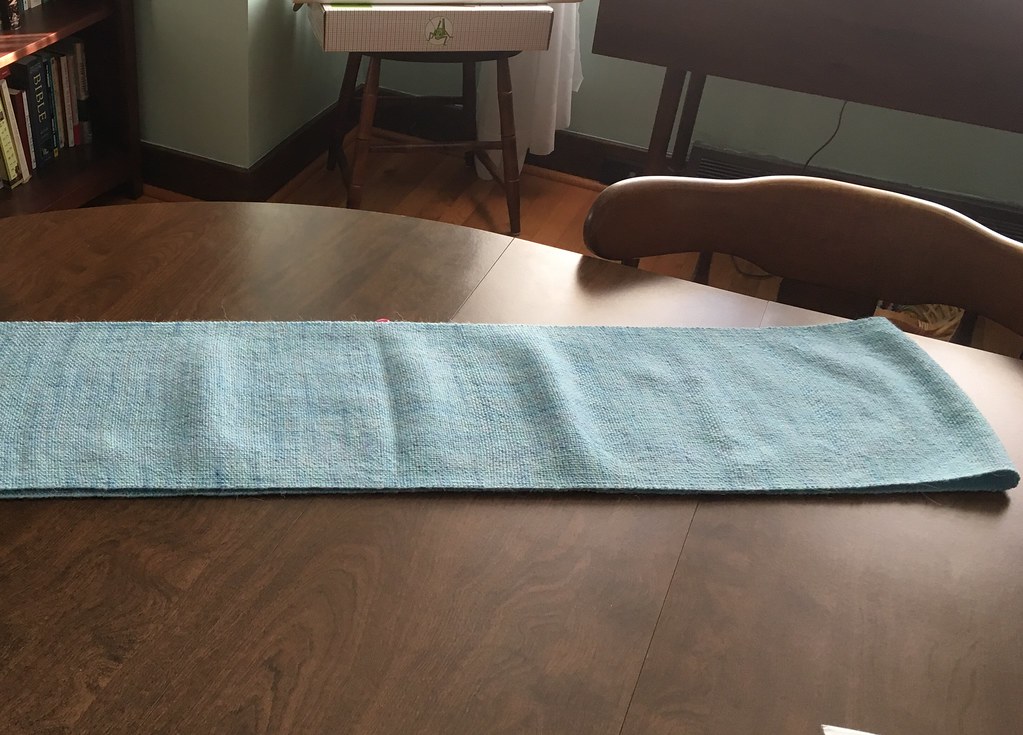
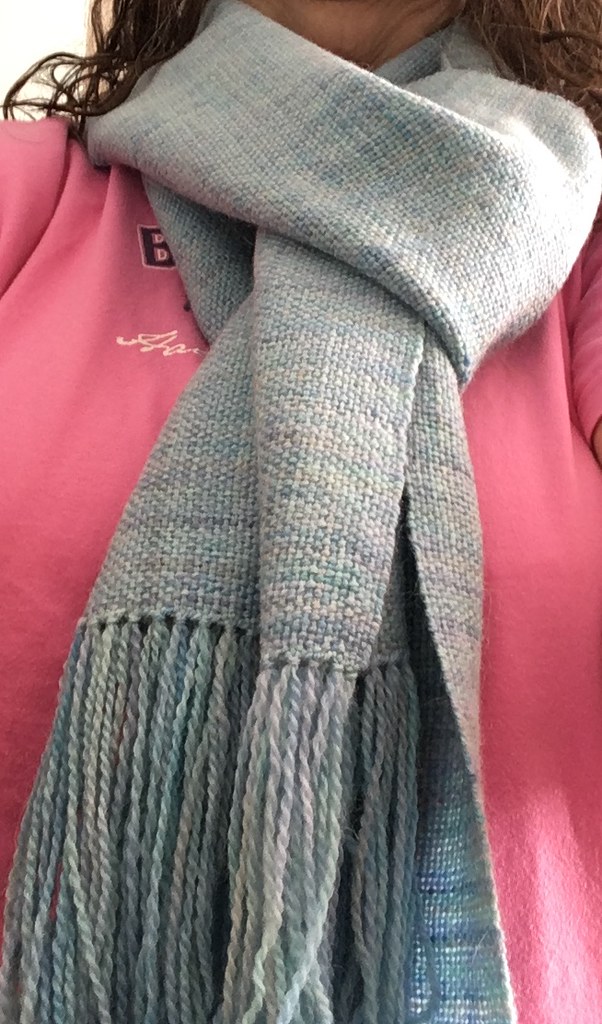
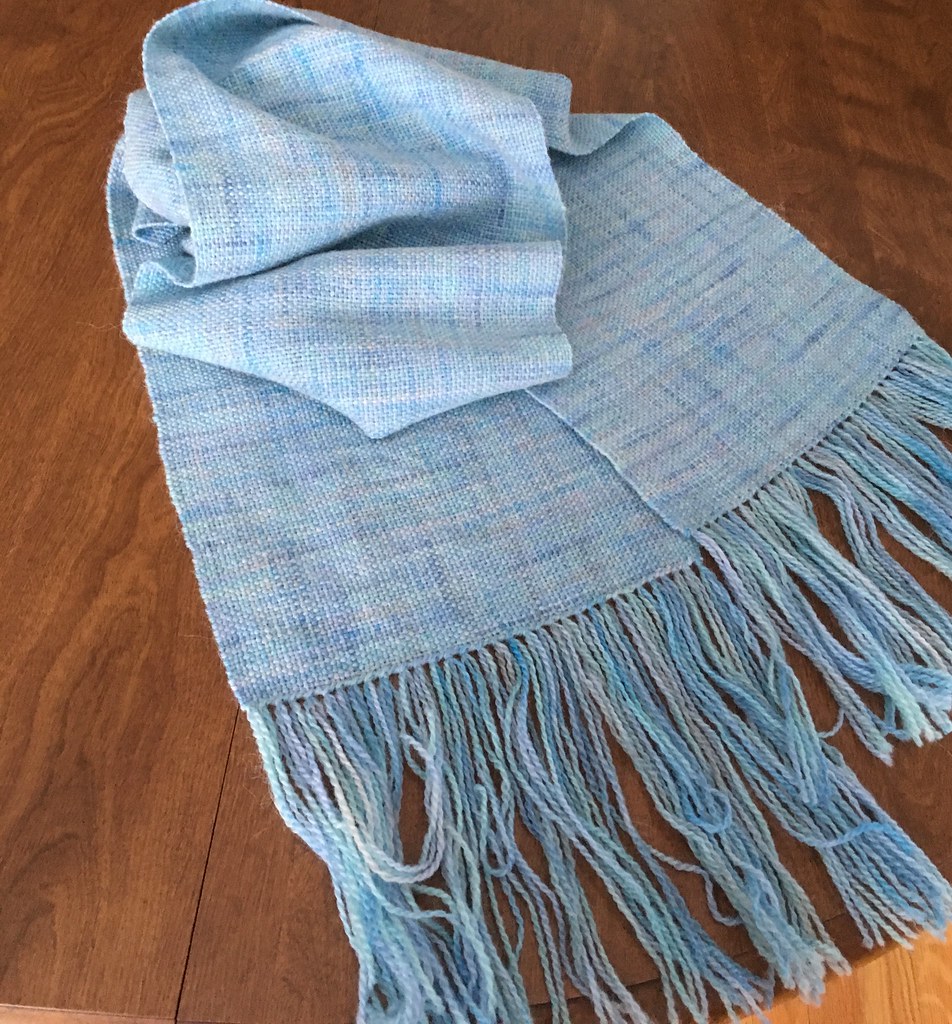
The finished scarf, washed and trimmed. I made up the pattern myself using a couple of published patterns as inspiration. The colors are not really my kind of colors, but the blue-green and purple-pink yarn came with the loom and I had the natural in my stash. It is all Brown Sheep Nature Spun worsted weight wool.

I don’t think it’s bad for a first effort. My selvedges are shite, but for the most part I got a balanced weave, that is, the number of warp stitches per inch and the number of weft stitches per inch are the same, which is what I was trying for.

I should be able to slam through my sock yarn stash using my loom. And once I am satisfied that my weaving skills are passable, I will start using some of my hand-spun yarn for weaving. And once I have at least made a dent in my stash, I might even buy some cotton or cotton-linen yarn and make some kitchen towels, placemats, and napkins. But all in good time, dear reader, all in good time.

All in all, I enjoyed this project immensely. I wasn’t sure I would like weaving, which is why I decided to buy a relatively inexpensive loom. I was surprised how relatively easy it was and how natural weaving felt. It wasn’t awkward, not even at first. It just felt like something I’ve done all my life although the only weaving I’ve ever done was making potholders with those stretchy loops they used to sell at the five and ten on the corner of Jefferson and Third.

If I enjoy my next several projects, there just might be a larger rigid heddle loom in my future. Stay tuned.

Finish Line

The Tour de Fleece 2018 has come to an end, and, wowsers, did I ever get a lot accomplished. I plied a couple of bobbins of singles that I had spun during the Stanley Cup playoffs, spun a whole bunch of Spunky Eclectic club selections from 2015 and 2016, and got all of the singles except the very last set plied.

That’s a lot of spinning and plying, eh. The two bobbins in the upper right of the picture are the only singles that were spun but not plied during the TdF.

The bobbins on the top right in the picture above hold these singles, Spunky Eclectic Big Thaw on Manx Loaghton. I plan to ply the two bobbins together to make a 2-ply yarn.

And so ends another Tour de Fleece. I think it gets better each year. Team Schacht is the most supportive team I have come across in all my years doing the TdF and I hope to spin with them again next year.

Next up––setting the twist on these skeins and on a shit ton of other skeins from my Stanley Cup playoffs spinning, plying a couple of bobbins of Loop bumps that I spun on my Ashford Travvy, and finishing a pair of socks knit out of my handspun. And maybe some cat talk. Who knows?

Rest Day

Today is the second of two rest days during the Tour de France and Tour de Fleece, so it seems like a good opportunity to update you, dear reader, on my progress.

Aren’t these colors just amazing? This is a Spunky Eclectic Spunky Club selection from June 2016 in the color way Easy Peasy. The fiber is Cheviot, which is one of my very favorite fibers to spin.

I had two bumps of Easy Peasy and after splitting them into thin strips, I spun them end to end on my Schacht Flatrion in double drive. The bobbins are posing on my Ladybug. I still haven’t decided how I am going to ply these singles. I might chain ply them to make a self-striping yarn with short color repeats, or I may ply from both ends of a center pull ball, or I may do one of each.

This is another of the second bumps from a Spunky Club selection, this one in the color way TACO. I spun the other bump last year at this time. I spun these singles on my Schacht Ladybug in double drive using the high speed whorl and high speed bobbin. Nowadays I use my Ladybug mostly for plying in Scotch tension, but every once in a while I will spin on her just to remind me of how sweetly she spins in double drive. I honestly think that the Ladybug is the best all-purpose wheel on the market. She is so versatile and spins well in double drive, Scotch tension, and Irish tension.

These are the completed TACO singles. I spun this to make a 2-ply fractal yarn plied from both ends of a center pull ball. I split the fiber in half lengthwise, spun one half end to end, then split the other half into thin strips lw and spun them end to end on the same bobbin. When I ply the singles, I won’t have any of that pesky leftover yarn to deal with.

Lulu the torbie keeps me company when I spin.

Lulu says, Look at me! I’m so pretty! My mommy loves me to sit with her while she spins.

My current project is Be The Light on mixed BFL, also a Spunky Eclectic Spunky Club selection from bygone days, October 2016. This is the first bump, spun in double drive on my Matchless.

This is the second bump of Be The Light. For the first bump, I split the fiber lengthwise into very thin strips which I then spun end to end. For this bump, I split the fiber in half lw and I’m spinning both lengths end to end. I will ply the two singles together to make a fractal yarn that will probably become a scarf or maybe a shawl. I love the subtle striping of fractal-spun yarn. I know I will end up with the dreaded left-over singles, but I will cope. If there isn’t too much leftover, I will make a plying bracelet and attach it to the skein. I do this by winding the plying bracelet without breaking the singles. It’s not as difficult as it sounds. If there’s too much leftover singles, I will wind a center pull ball and ply from both ends to make a mini skein.

The TdF ends in six days, and I am almost finished spinning the fiber I hoped to get done during this year’s Tour. I still have some plying to do, so I have plenty of time to reach my goal and maybe even surpass it. YAY!

Tomorrow is a challenge day, and I’m not sure yet what my challenge will be. Maybe it will just be to finish up Be The Light or to do some plying. Or maybe I will try doing some long draw again. I’m terrible at long draw and really need to practice. But I’m so bad at it that I always feel like I am ruining the fiber. Sigh.

The Tour De Fleece 2018 Continues

So, today I am going to report on days 8, 9, 10, and 11 of the TdF which correspond to stages 8, 9, and 10 of the Tour de France. Day 10 was a rest day–no racing for the cyclists–so from here on out, the days and stages will have different numbers.

On Day 8/Stage 8, I finished spinning the Black Pillar singles. I still haven’t plied them.

On Day 9/Stage 9, I plied all the singles I had spun so far, except for Black Pillar, and I also plied some singles that I had spun during the Stanley Cup playoffs. Top l to r: Aspens, Feathered Friend Far left: Out of Season (spun during the Stanley Cup playoffs) Middle, l to r: Squirrel, Little Bluebird, Caribou Bottom: The Undead All fibers by Spunky Eclectic.

Monday, Day 10, was a rest day, and this year I actually took a break from spinning on the first rest day. But that doesn’t mean I was idle. I spent some time preparing fiber for spinning.

Yesterday, Day 11, Stage 10, was a challenge day, so I spun a new-to-me fiber blend, Merino/yak. Both fibers have a short staple and are very soft. I was expecting it to be a bit difficult to spin, but it actually was pretty easy. The color way is Game Birds from Spunky Eclectic, a CLUB Remix selection from 2015.

All the plying was done in Scotch tension on my Schacht Ladybug except for Squirrel, which was both spun and plied in Scotch tension on my Schacht Flatiron.

Today I will be spinning again. I am going to start on a 2016 Spunky Club selection and spin both bumps. That’s ~8 ounces of fiber, so I probably won’t get it all spun today, but I should make a dent in it. I’ll will post pictures tomorrow.

TdF 2018 Days 6 & 7

More spinning! And with any luck, I will remember how to insert pictures from Flickr and add captions.

The singles spun from the Farmer’s BFL from Spunky Eclectic in the color way Aspen were almost but not quite finished on Day 6/Stage 6.

I finished the Aspens singles on Friday, Day 7/Stage 7 of the TdF. I still haven’t decided how I’m going to ply these, but I’m leaning toward a 2-ply from a center pull ball at the moment.

Day 7/Stage 7 This is the last of the second bumps from my Spunky Club, this one from March 2016. The color way is Black Pillar and the fiber is Po-Mo-Silk, a blend of Polwarth, mohair, and silk. It’s lovely to spin and loves to be spun very thin. I might get the singles finished on Day 8.

My Matchless has been getting a workout so far, but my Flatiron isn’t being neglected. I’m spinning Black Pillar on the Flatiron in double drive using the smaller pulley on the fast whorl (17.4:1). If you look closely, you will see that my drive band is black. I’m trying out a new to me type of drive band based on recommendations on the Schacht forum on Ravelry. It’s hemp, and the first time I used this drive band, I wasn’t thrilled with it. But I decided to try it for this project, and so far I really love it. I am getting a steady but soft take-up without any backspin and with light treadling.

The Hemptique 10# hemp cord that I bought comes in a boatload of different colors, including some variegated, and I couldn’t decide on a single color, so I bought a variety pack that has a dozen different colors on small spools.

Look at all those colors! And there are many more colors available. It’s no wonder I couldn’t choose just one

Each spool is enough for 2-3 drive bands (depending on the size of the drive wheel). I don’t think the hemp cord will replace the 8/4 cotton rug warp (seine twine) that I love (and that also comes in a boatload of different colors), but I will definitely be using it in addition to the rug warp.

¯\_(ツ)_/¯

So, after publishing my blog post, I tried to find out why I wasn’t able to caption the pictures that I linked directly from Flickr instead of uploading them to the WordPress media gallery. I couldn’t find anything that even addressed linking pictures from a URL, but I tried linking from a URL again and, lo and behold, this time it worked. I got the screen that allows me to caption pictures before inserting them into my blog post.

This is the screen I am used to getting when I insert a picture into my blog using a Flickr URL. There is a box for adding the caption, a box for picture alignment, and a box for linking to the image.

I thought I had figured out what the problem was. I thought I was using the wrong URL from Flickr. But when I tried a second time in an effort to get screen shots to show you what the hell it is that I’m on about, the very same thing happen again; I got the same screen that doesn’t allow for adding captions.

No caption box, no alignment box, no URL linking box, just the picture.

I can insert the picture into my blog from this screen, but there is no way to add a caption because the editing function simply doesn’t work.

See that little pencil beside the x in the bubble? If you click on the pencil, it is supposed to take you to the editing screen where you can add a caption, align the picture, and do some other stuff.

Clicking on the editing pencil brings up a page that looks just like the second picture. What I’m used to seeing is a more complete editing choice that allows me to choose the alignment and then click on the editing pencil to get the screen that allows me to add a caption.

Notice that in addition to the pencil and the x, there are also 4 alignment boxes to choose from. This is what I am used to getting when I select a picture I added to a blog post from a URL.

It took me a little while to finally figure out what I was doing wrong, and when I did, I went full Homer Simpson––DOH! For some reason, probably because it has been a while since I blogged, I was copying and pasting the URL from the URL bar on the Flickr page instead of right clicking on the picture itself and selecting “copy image address.” I don’t know why that makes a difference, but you do get a different URL with the second method than you do with the first and it seems to make all the difference in the world.

Lesson learned. I need to start blogging more regularly again. LOL